I’ve put together this free pattern using the main part of
the Parker Booties
by Sewrella but swapping in the cuffs from the Crocodile Stitch Booties by
Lolly's Crafty Crochet.
Both of these are free online patterns in US terminology. I've made the Parker Booties for my granddaughter in DK
instead of the suggested worsted and been very pleased with them. When I was looking for some booties that used
crocodile stitch, I found and made the ones by Lolly’s Crafty Crochet. It’s a
great pattern but I like the roomier feet of the Parker Booties. You can work out the pattern from the 2 original free patterns but I've adapted it and laid it out for you here in UK terms with photos for the tricky bits. There are plenty of tutorials online for working the crocodile stitch which will make things clearer, if you’re struggling.
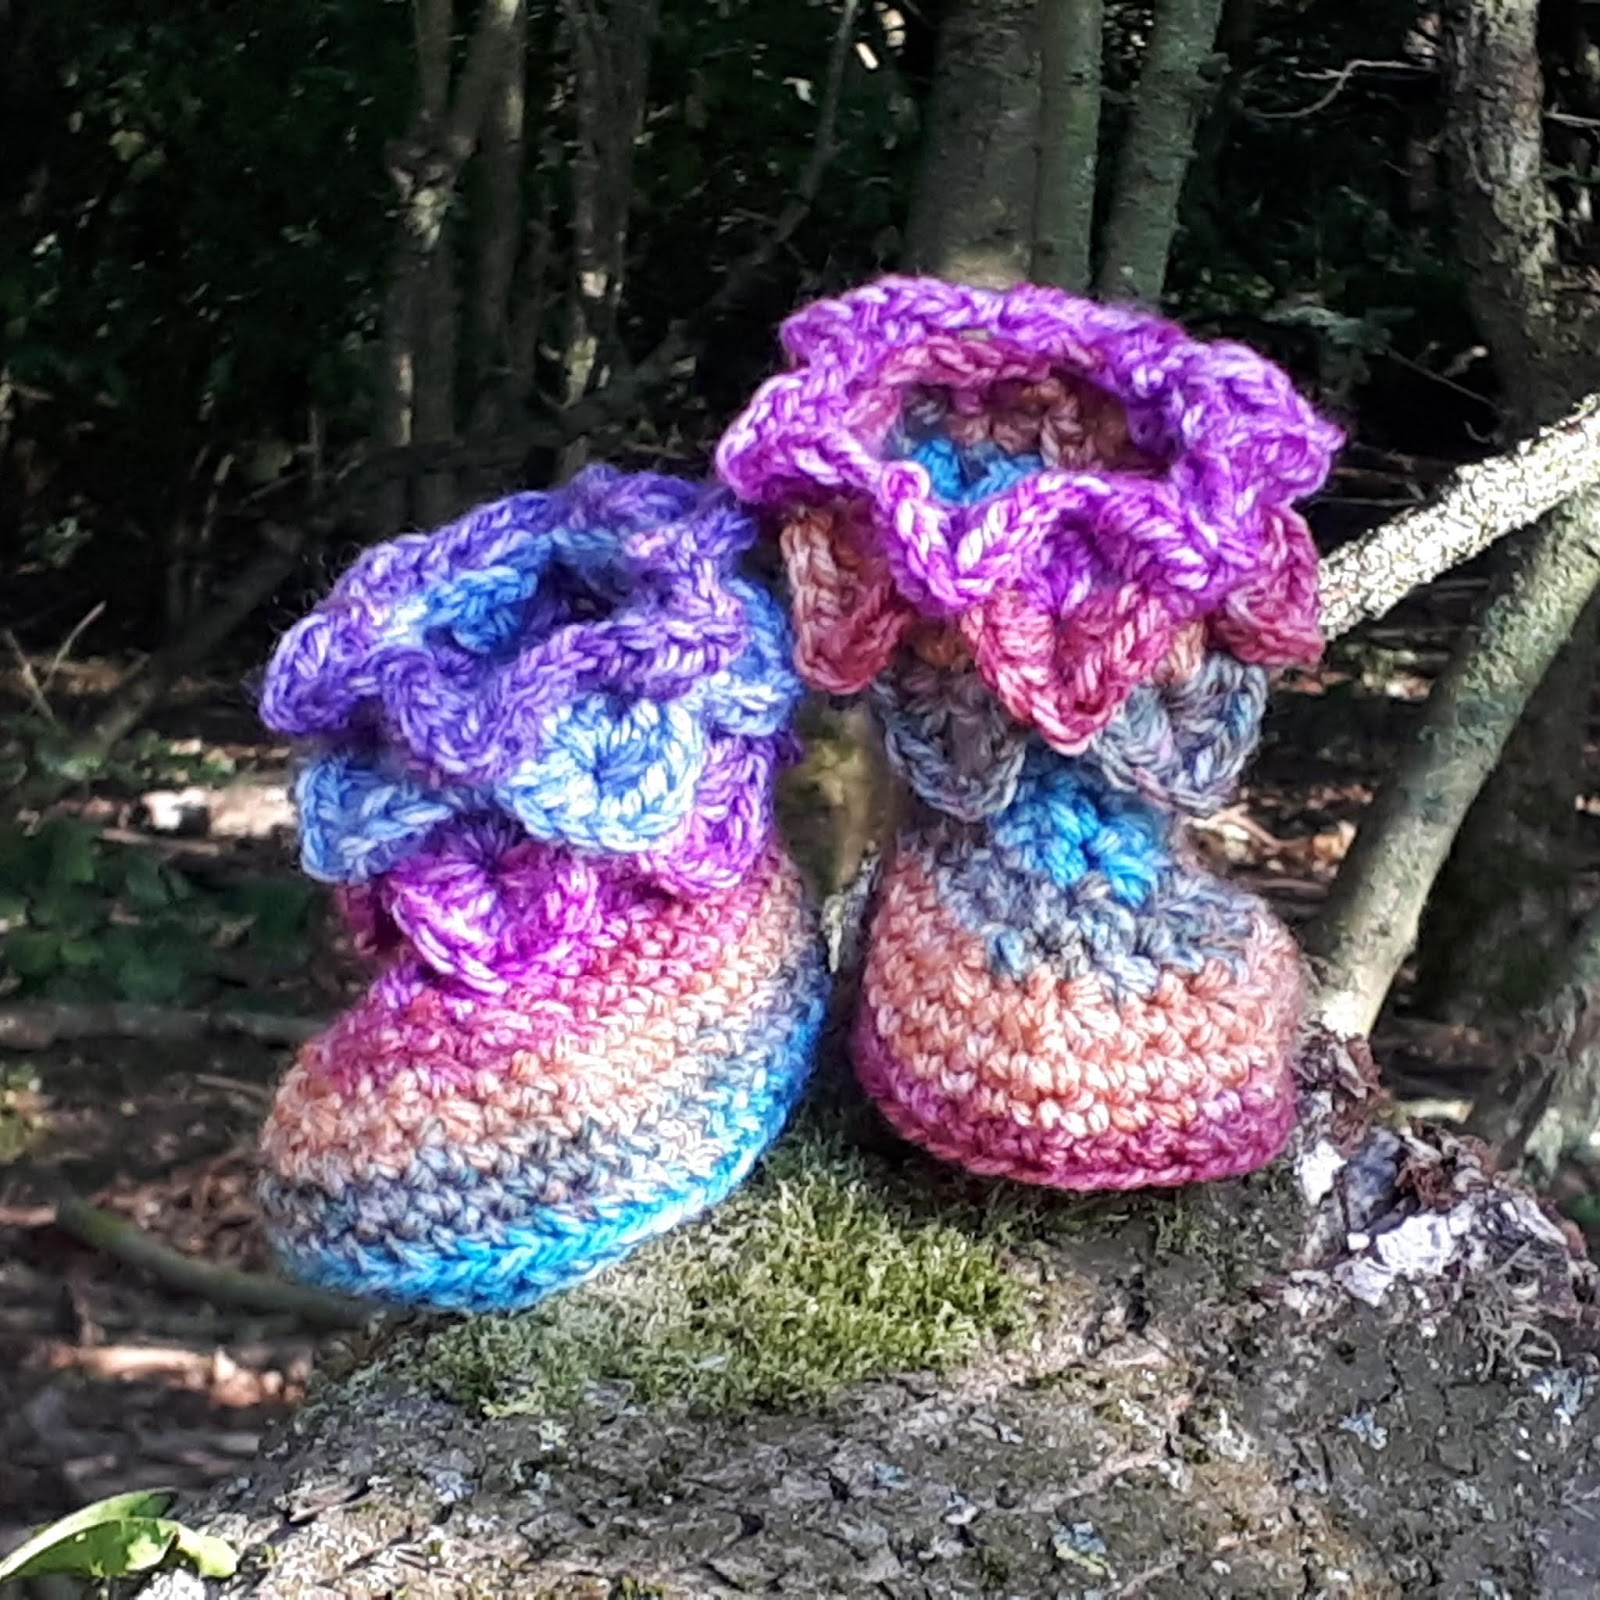
I chose a variegated yarn to really show up the stitches. A
more particular person would probably like to start both booties at the same
colour variation so that they match but I just go with the flow. The shade code
is 0477 and has purple in it – always a good colour for mystical creatures.
Thank you for choosing the Baby Dragon Booties and I hope
that the little dragon in your life will have cosy toes wearing them. Any
questions or comments are welcome. Do share any photos with me on Instagram
@grannylawlorcrafts or on my Facebook page. Use #babydragonbooties
This pattern may not be sold but products made using it may
be sold. Please let customers know that they came from Granny Lawlor Crafts.

Materials:
Hayfield Bonus Breeze DK - 30g (any DK yarn will do but check
your tension)
4mm crochet hook
Aran weight yarn and a 5.5mm crochet hook will give a larger
size of booties.
Sizes:
0-3m using DK and 4mm hook; sole measures 9cm
3-6m using Aran and 5.5mm hook; sole measures 10cm
Skill Level: Intermediate
Abbreviations
All instructions are given in UK terms throughout. The
equivalent US terms are shown below
|
|
UK terms
|
Equivalent US term
|
|
CH
|
chain
|
|
|
DC
|
double crochet
|
single crochet
|
|
DC2tog
|
double crochet 2 together
|
Single crochet 2 together
|
|
FDC
|
foundation double crochet
|
foundation single crochet
|
|
FPTR
|
front post treble crochet
|
front post double crochet
|
|
HTR
|
half treble
|
half double crochet
|
|
RPT
|
repeat
|
|
|
SK
|
Skip
|
|
|
SLST
|
slipstitch
|
|
|
|
|
|
|
| ||
|
|
|
FDC – foundation double crochet – casting on without making a
chain first. I find this much easier than using a chain and you can find many tutorials
online, mostly in US terms so google “foundation single crochet” – confusing, I
know! If you prefer, you can use the chain method.
FPHTR – YO and insert hook from the front to the back around
the post of the htr of previous row. Complete as for a regular htr stitch.
V-ST - (HTR, CH 1 and HTR) same st.
Tension
4.00mm hook: 9 htr x 8 rows to 5cm
Instructions for Baby Dragon Booties (Make 2)
Sole
If your yarn is variegated and you want matching booties,
make the slip knot loop at the beginning of a colour section and make a note to
start the 2nd bootie in the same place.

I weave my starting yarn end in as I work round 2. The
alternative is to sew it in later. I’m all about avoiding the sewing!

Round 2: CH2; HTR in first st; 2 HTR in next st; HTR in next
6; 2 HTR in next 2; HTR in next 2; 2 HTR in next 2; HTR in next 6; 2 HTR in
next st; HTR in last; SLST to join (29 sts)
Round 3: CH 1; DC in first 10 sts; 2 DC in next 2 sts; 2 HTR
in next 5 sts; 2 DC in next 2; DC in next 10; SLST to join (40 sts - NOTE
different stitches – easy to miss)
Sides

Rounds 4-5: CH 1; DC around in back loops only; SLST to join
Rounds 6-7: CH 1; now working in both loops, DC around; SLST
to join (40 sts)
Now is a good time to sew in the starting yarn, if you didn’t
weave it in, before the cuff restricts access.

Top of foot
Round 8: CH 1; DC in first 12 sts; [DC2tog, DC in next 2] 4
times; DC in next 12 sts; SLST to join (36 sts)
Round 9: CH 1; DC in first 14 sts; DC2tog; DC; DC2tog; DC; DC2tog;
DC 14; SLST to join (33 sts)
Round 10: CH 1; DC 10;
6 DC2tog; DC 11; SLST to join (27 sts)
Round 11: CH 1; DC 10;
3 DC2tog; DC 11; SLST to join (24 sts)
(that is the end of following the Parker Booties)
Cuffs
Round 12-13: CH 1; DC around; SLST to join (24 sts)
(The following is the part adapted from the Crocodile Stitch
Booties)
Round 14: CH 3; HTR in same st; SK 1st; work 11 V-STs - (HTR,
CH 1 and HTR) same st - to end; SLST join to 2nd ch of start (12
v-sts)
Rotate the bootie a quarter turn anti-clockwise. Work will
continue “down” over the V-stitches.


Round 15: CH 2 (counts as 1 HTR); working from top to bottom
around post of first htr of first v-st, work 3 FPHTR; half turn the bootie; CH
1; working from bottom to top around post of second htr of v-st, work 4 FPHTR;
* half-turn the bootie; skip next v-st; working from top to bottom work
4 FPHTR around post of first htr of next v-st; CH 1; turn work so v-st is
sideways; working from bottom to top around post of second htr of v-st, work 4 FPHDC;
RPT from * around; join with SLST in top of last v-st and top of starting ch (6
scales in total)
Round 16: with inside of bootie facing you, CH 3; HTR in same
st, including the gap between the scales below (1st v-st); V-ST in
sp in the centre of the scale below; * V-ST in next ch 1 sp, including the gap
between the scales below; V-ST in sp in the centre of the scales below; RPT
from * to * around; join with SLST in top of first htr (12 v-sts)
Round 17: rpt round 15, off-setting the scales from the
previous row
Round 18: rpt round 16
Round 19: rpt round 15, off-setting the scales from the
previous row
Fasten off yarn and sew in ends securely.
Make a pair and the booties are ready for the little dragon
in your life! Do share any photos with me on Instagram @grannylawlorcrafts or
on my Facebook page. Use #babydragonbooties

Click on the SUBSCRIBE button if you want to see my posts when they're released


